Introduction
The document describes the structure and functions of the Approval application. The application consists of these basic parts:
The application provides these basic functions:
- Approving requests for orders, documents, internal documents, received and issued invoices
- Multi-level approval (setting up approval processes)
Creating approval request
Approval process can be created and used for Order (Store application), Document (CRM application), Internal document (Organisation application), Incoming invoice and Outgoing invoice (Finance application).
The principle of submitting applications and subsequent approval is the same for all files. This guide explains the principle of approval using the example of an Order. The example assumes that Approval process has already been created for the Order by the authorized person, see below.
On the tab Approval process of the order, you can create a request for its approval, i.e. submit the order for approval. Creating a request consists of choosing a pre-set process in the field Approval process and then clicking on the button Create a process for the given record.
The approvers defined in the selected Approval process are displayed in the tree structure according to the order in which they will process the request, i.e. from top to bottom. First, the approver in the superior step receives the record for processing, then the approver in the subordinate step. (The approval tree structure is independent of the user structure and roles.).
Furthermore, Date of request is automatically filled in with the current date and time. Once the approval process has started, changes to the form fields that are the subject of approval are disabled.

Picture 1 – Creating approval request
At this point, the request is in “Approving” status and cannot change order items. As with the “Approved” status, see picture 2. These can be changed only after the possible rejection of the application. We can save the approval request.
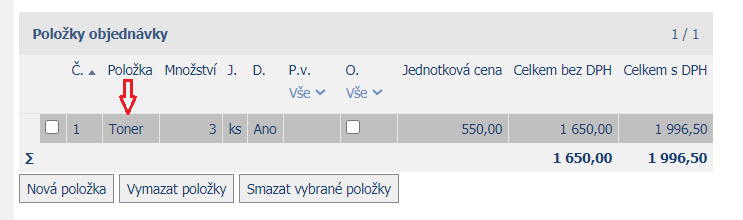

Picture 2 – After submitting the approval request, the order items cannot be changed
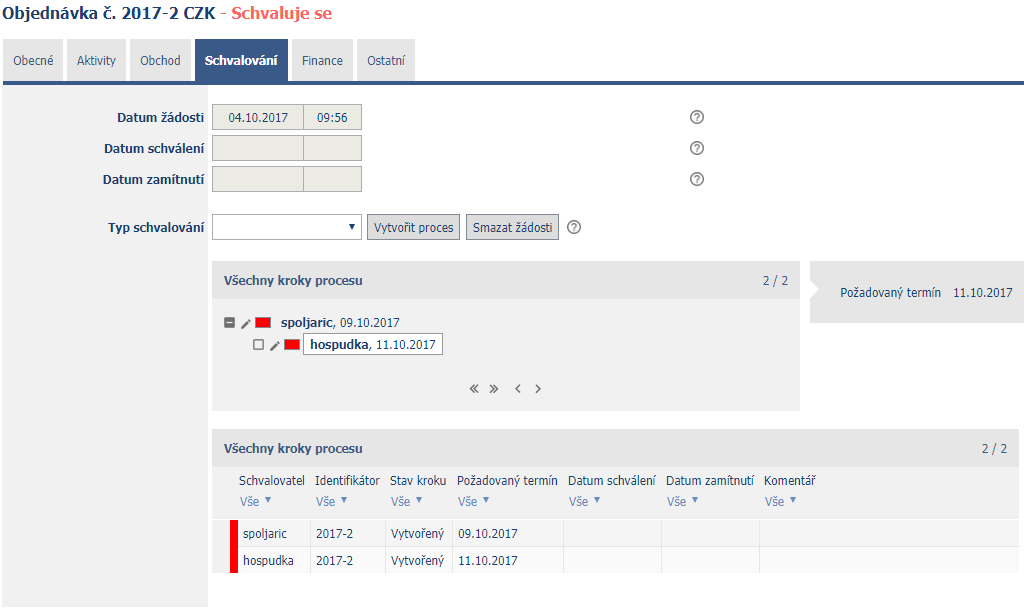
Picture 3 – Order status after clicking Create Process button is set to “Approving”
Delete requests
Button Delete my requests:
- If the date of approval or rejection is not filled in, the process is not completed, those requests created by the user themselves will be deleted. It is necessary to inform the user with a higher authorization about the deletion of the remaining requests.
The button Delete all requests:
- If the date of approval or rejection is not filled, the process is not completed, it will delete all the steps of the process. Features for users with higher privileges. I.e. the user must have set the user group 2. Store – full access in case of deletion of requests in the order.
To delete requests in documents and invoices, the user must have set user groups according to the following table:
| User group | Function | |
|---|---|---|
| 1. | Customers – Full Access | Documents |
| 2. | Store – Full Access | Order |
| 3. | Organisation documents – full access | Internal document |
| 4. | Finance – Full Access | Invoice |
Add and change approver
Users with full approval access can add or change approvers in a request, i.e. must have user group set:
| User group | Function | |
|---|---|---|
| 10. | Approvals – Full Access | Approval |
By clicking the New Step button, a view page will open for saving a new approval step, see picture 4. With the "Save step" button, the selected user is saved as a new request approver, see picture 5.

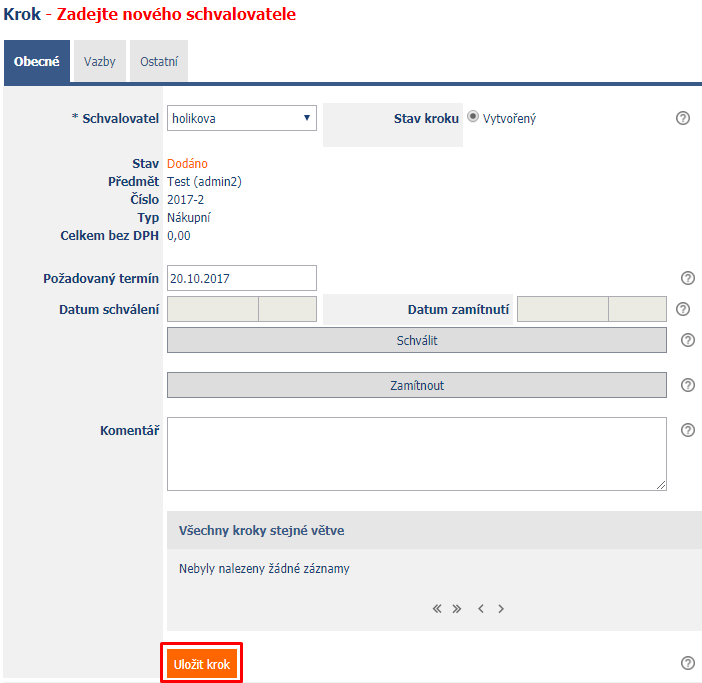
Picture 4 – Adding a new approver to the approval process
The newly added approver can be removed with the Delete step button. You can delete the approver who does not have a subordinate step under him in the approval structure. It is also not possible to remove an approver for already completed approvals.
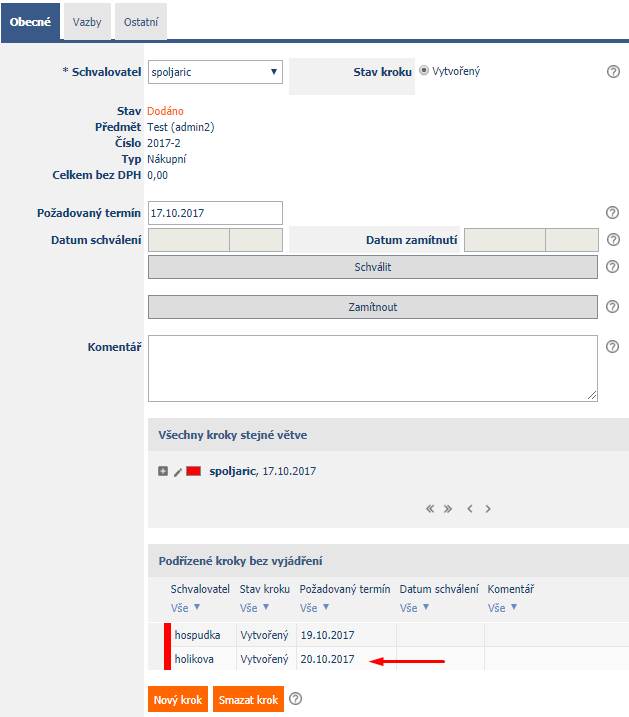
Picture 5 – Newly Inserted Request Approver
The approver of the current step can be changed in the Approver control element, and the deadline by which the request should be processed can be changed in the Requested deadline field, see picture 6. We save the change by clicking on the Save step button.
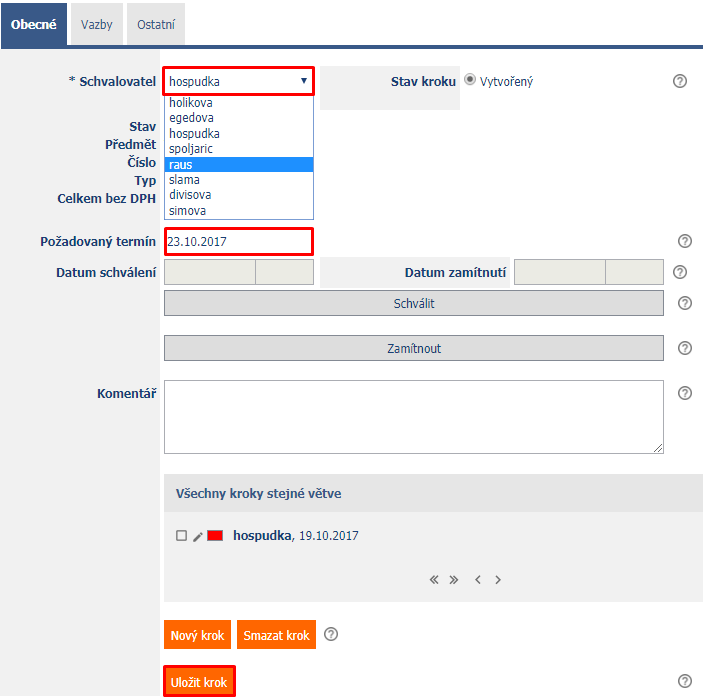
Picture 6 – Change Approver and Required Date for Current Step
Approving requests
If the user wants to approve or reject the request, he opens it from the relevant order or through the Approval process application. This can be found on the tab Finance – Aproval process – My pending processes or as partial approval for individual applications Store – RFQs and purchase or sales orders – Approval process – Requests pending my approval. When a request is created, the approvers who approve the request are automatically notified by email, from which the request record can be opened. Approvers can also see the request to approve the request in the portlet on the main page.
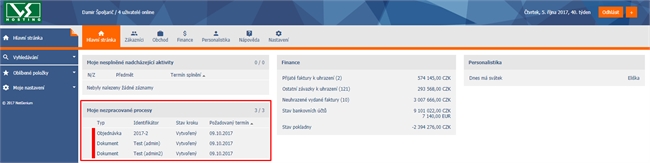
Picture 7 – Viewing the approval request on the main page
In the case of gradual approval, the first approver is notified by e-mail first, only after his approval is the second approver, etc. Also in the portlet on the main page, the second approver will see the approval request only when it has been approved by the user in the parent step.
In the request form, see picture 8, you can see the details of the order and the required approval date. With the Approve button we can approve the request, with the Reject button we can reject it. Rejecting the first step of the application ends the entire approval process. When an application is rejected, the reason for the rejection must be added to the comment.
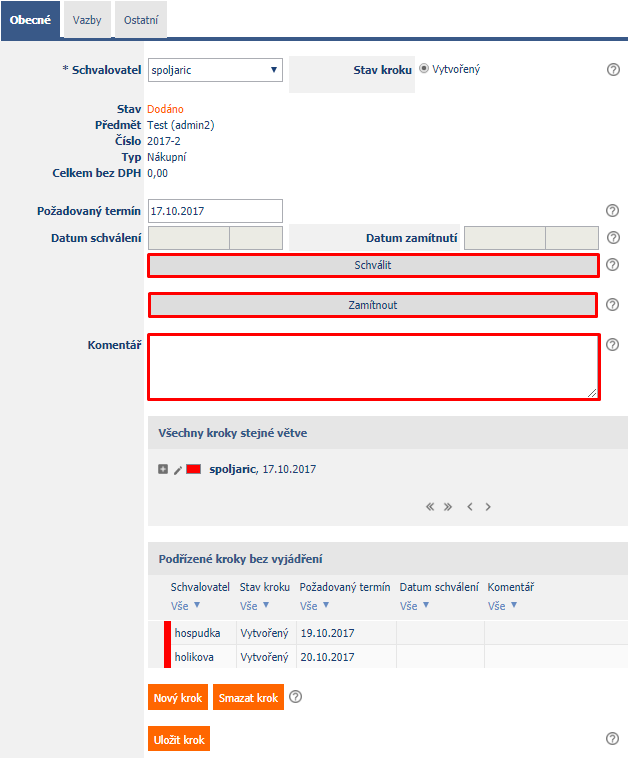
Picture 8 – Application Form
At the end of the approval process, the applicant is always automatically informed of the approval result by e-mail. The approval result can be seen in the All requests for quotation and purchase or sales orders datagrid.
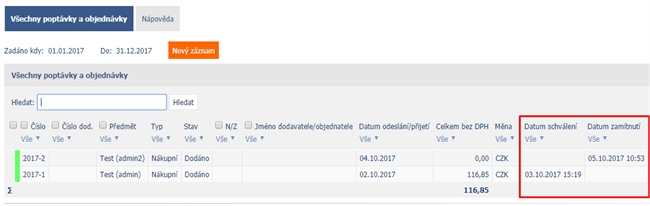
Picture 9 – Entering the approval result
After approval, the order status will change to "Approved". Depending on the process settings, the date of approval is also populated. Schemes of processes and actions that are activated in case of approval/rejection of the application can be found in the chapter Processes.
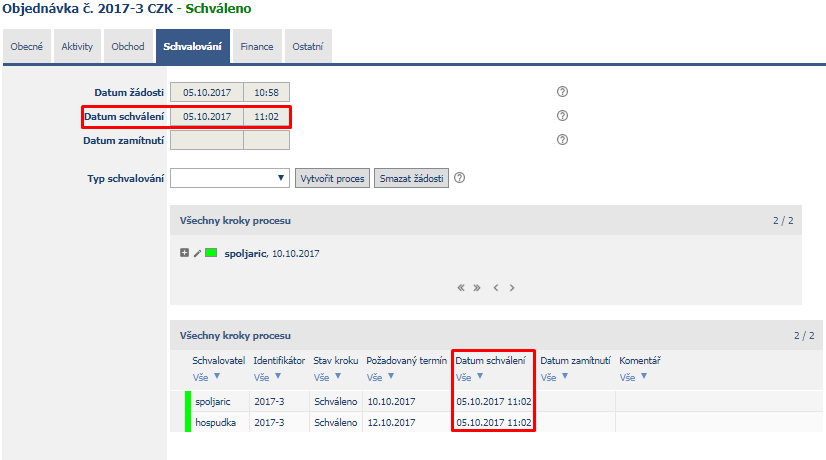
Picture 10 – Approval result in order
Processes
As part of the Approval application, which is used for approval, it is possible to create any number of processes (approval schemes). The function of creating approval schemes is available only to users with higher authorization to whom the user group is assigned:
| User group | Function | |
|---|---|---|
| 4. | Finance – Full Access | Process settings |
Before setting up the Approval Process itself, you need to create a Types of steps, in which we specify the name of the buttons and the value of the output status. In the navigation bar, we click on the view page Process settings – Types of steps – New entry.

Now we can click on the browsing page Process settings – Processes – New entry in the navigation bar.
Processes are preset approval templates containing approvers and their specific names. As part of creating processes, approvers can be moved in the approval hierarchy according to the order in which they are to approve the request.
Templates with assigned approvers appear in the approval types.
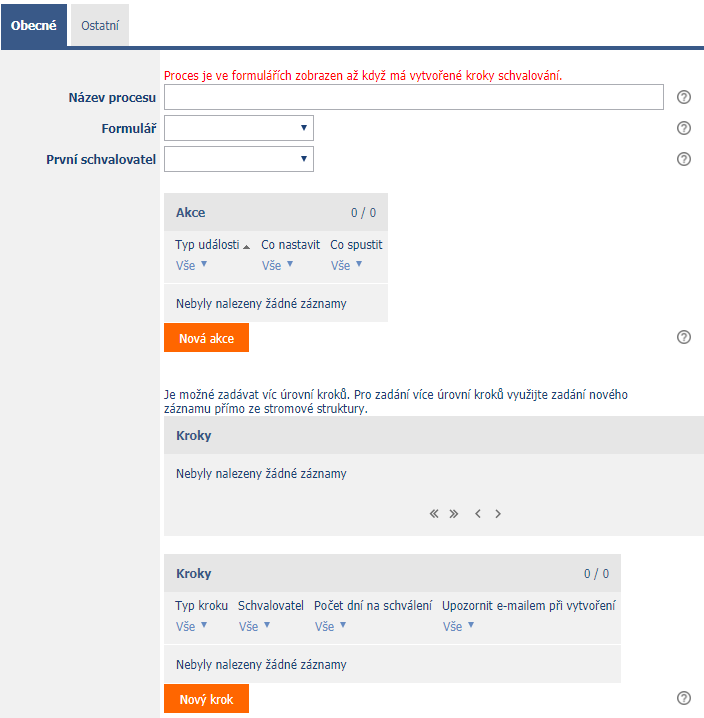
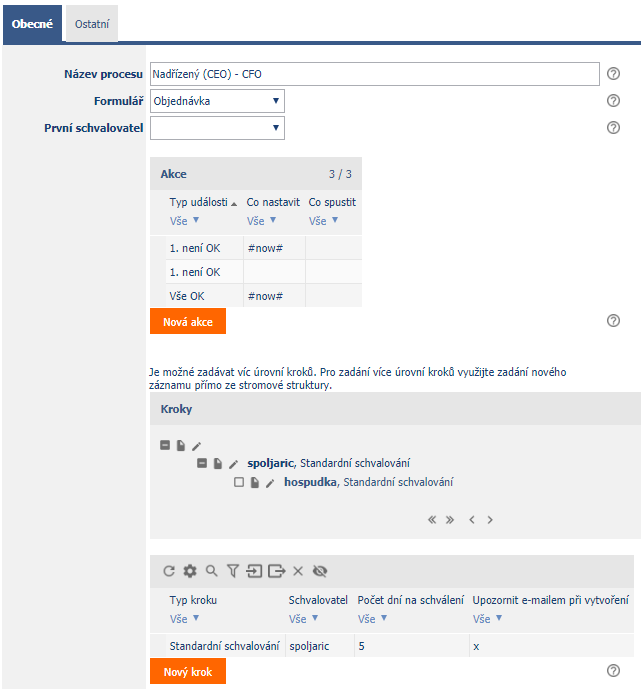
Picture 11 – Process Setup Form
Here it is necessary to define the name of the process that will be displayed in the "approval type". Next, we define the form in which the process will be applied (Order, Document, Internal document, Outgoing invoice, Incoming invoice). The First approver control is described in more detail in the next chapter.
After checking the "Transparent" box, the newly created process will be visible to all users who want to submit an approval request.

Picture 12 – Process Setup Form
Action
The action will allow us to define what happens in case of approval/rejection of the request. In case of selecting Event type: All Ok , the current date and time of approval will be set to the order form in the field Date of approval.
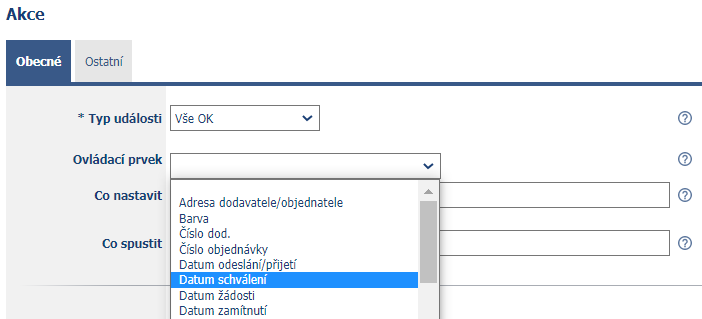
Picture 13 – Settings for filling the date of approval field
We set the date by filling the What set field with the value #now#.
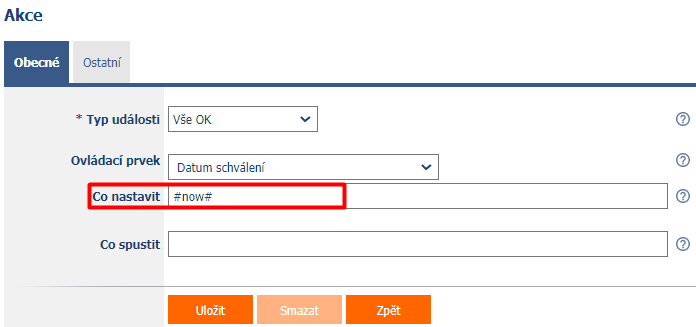
Picture 14 – Setting to current date and time
In the What set field, we enter the following values:
#now# - sets the current date and time in the format 5/18/2016 10:05 AM
#today# - sets the current date in the format 5/18/2016
We can save the action. We have defined what happens after the approver clicks the Approve button. In a similar way, we will set the actions in case of rejection, where in the order form the control element Date of rejection will be filled with the current date and time.
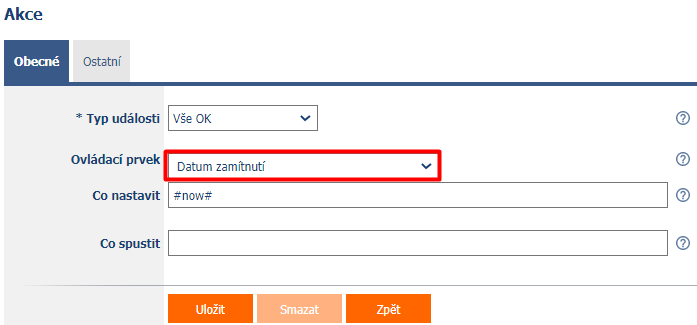
Picture 15 – Settings for filling the date of rejection field
In case of rejection, we also define an action to reset the Date of request to zero. We achieve this by leaving the What set field empty.
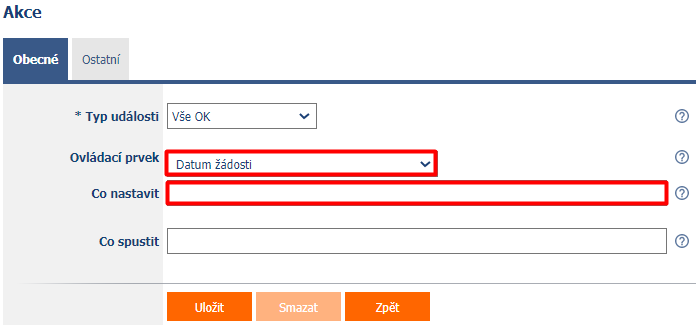
Picture 16 – Settings for filling the date of request field
The resulting actions for approval and rejection look like picture 17.
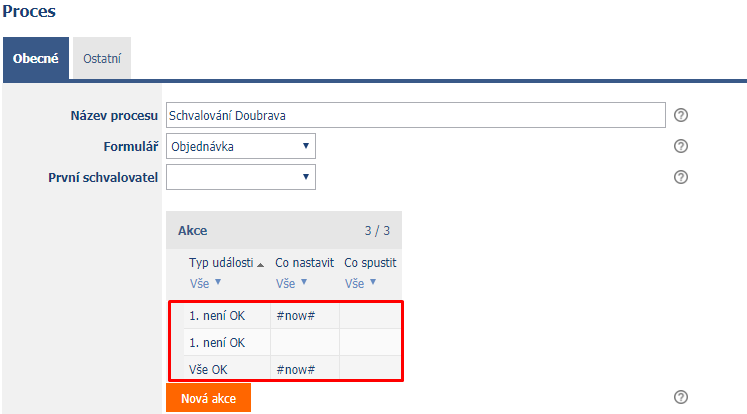
Picture 17 – All Process Actions
Steps
After clicking the New step button, a form for a new approval step will open. We choose Type of step, whose functions are:
- Renames the buttons that serve as "positive reaction" or "negative reaction" within approval.
- Hides the Reject button.
- Sets the exit status and colour after a step is approved/rejected (The colour is only visible to approvers in the Approvals table. As a rule, the approval process does not affect the indication of the status of the record in the view pages of an ordinary user – for example, in the All RFQs and purchase or sales orders table, both approved and approved orders are displayed in the status “In preparation”.)
- Sets the name of the fields in which the date of approval or date of rejection is entered.

Picture 18 – Type of step Selection Form
Next, we set the fields Approved by, Number of days to approve and Default colour.
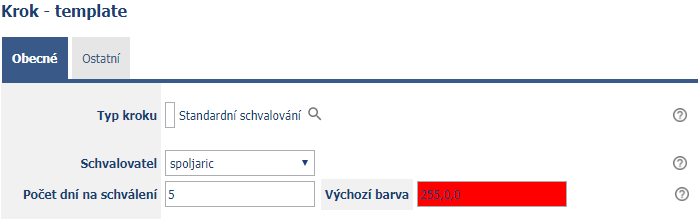
Picture 19 – Setting up other data in the process
Number of days to approve – the time the approver has to respond to the request, starting from the date of submission of the request.
Default colour - the colour that will be displayed when the step is created.
Picture 20 – Default Colour
When creating processes where a request is approved by multiple users, it is important to consider that the second approver must have a higher number of days for approval than the first approver. If both approvers had set the same number of days for approval and the first approver processed the request on the last day of the deadline, the second approver would have insufficient time to comment on the request. If the request is not processed by the required deadline, an e-mail is sent to the approver with an urgency to approve/reject the request.
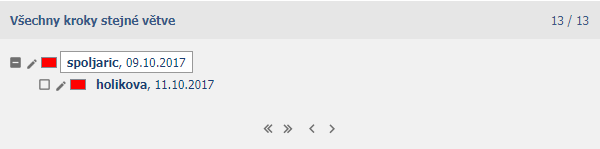
When setting the number of days for comments, you should be aware that the approver in the superior step and then the approver in the subordinate step will receive the record for processing first. The approval tree structure is independent of the user structure and roles. (E.g. According to the structure from picture 21, the order will be assessed first by the user spoljaric and then by the user hospudka.)
For the already assigned approval process in the order, it is possible to add additional approvers who will be added to the process only for this particular order. A new approver is added by creating a new step in an already existing approval step for this order. E.g. in picture 20, the “spoljaric” record would be opened and a new step would be added to it, thereby adding a new approver to the order.
After saving the step, the whole process looks like this.
Picture 21 – Resulting application process
First approver
The First approver field can be used in a situation where we want to link the order to the invoice and vice versa. In such a case, the Responsible person of the given document will be set as the first approver. If the first approver is the same as the approver from the process, then the approver from the process will not be created. The application thereby prevents duplicate approval of one application. As for the approver from the process, here too we will select Type of step, Number of days to approve and Default colour.
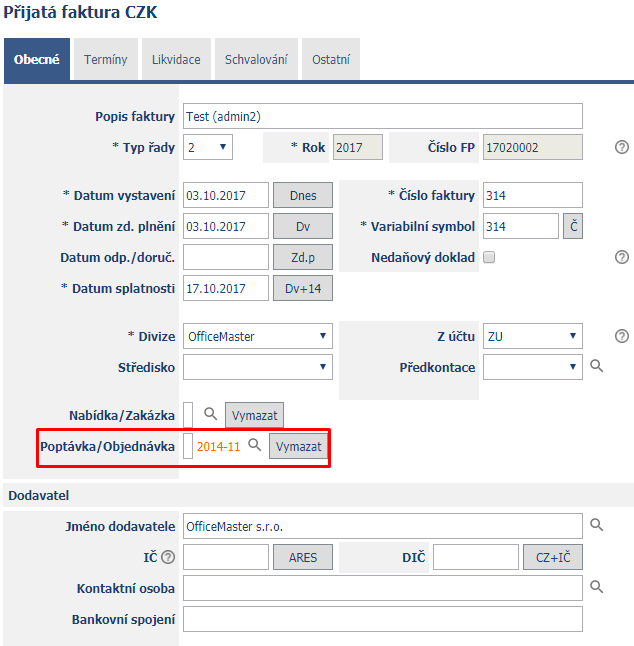
Picture 22 shows the creation of an approval process for an incoming invoice. By filling in the field First approver with the value Order, we choose that when approving the incoming invoice, the first approver will be the Responsible person specified in the order settings.

Picture 22 – Process Setup for First Approver Field
The connection of the order with the received invoice can be found in the Finance tab of the given order.

Picture 23 – Order and invoice linking
After linking the invoice to the order, it is possible to create an approval for the invoice. The link between the invoice and the order is shown in picture 24.
Picture 24 – Linking invoice and order